반응형
많은 분들이 자바 전체 소스코드를 원하셔서 이렇게라도 올려봅니다.
제가 프로젝트를 다 삭제해서 잠깐 코드로 적어놓고 테스트는 하지 않았습니다.
import android.app.Activity;
import android.bluetooth.BluetoothAdapter;
import android.content.Intent;
import android.support.v7.app.AppCompatActivity;
import android.os.Bundle;
import android.view.View;
import android.widget.Button;
import android.widget.Toast;
import app.akexorcist.bluetotohspp.library.BluetoothSPP;
import app.akexorcist.bluetotohspp.library.BluetoothState;
import app.akexorcist.bluetotohspp.library.DeviceList;
public class MainActivity extends AppCompatActivity {
private BluetoothSPP bt;
@Override
protected void onCreate(Bundle savedInstanceState) {
super.onCreate(savedInstanceState);
setContentView(R.layout.activity_main);
bt = new BluetoothSPP(this); //Initializing
if (!bt.isBluetoothAvailable()) { //블루투스 사용 불가
Toast.makeText(getApplicationContext()
, "Bluetooth is not available"
, Toast.LENGTH_SHORT).show();
finish();
}
// ------------------------------ 데이터 수신부 ----------------------------- //
bt.setOnDataReceivedListener(new BluetoothSPP.OnDataReceivedListener() { //데이터 수신
TextView temp = findViewById(R.id.temp);
TextView humd = findViewById(R.id.humd);
public void onDataReceived(byte[] data, String message) {
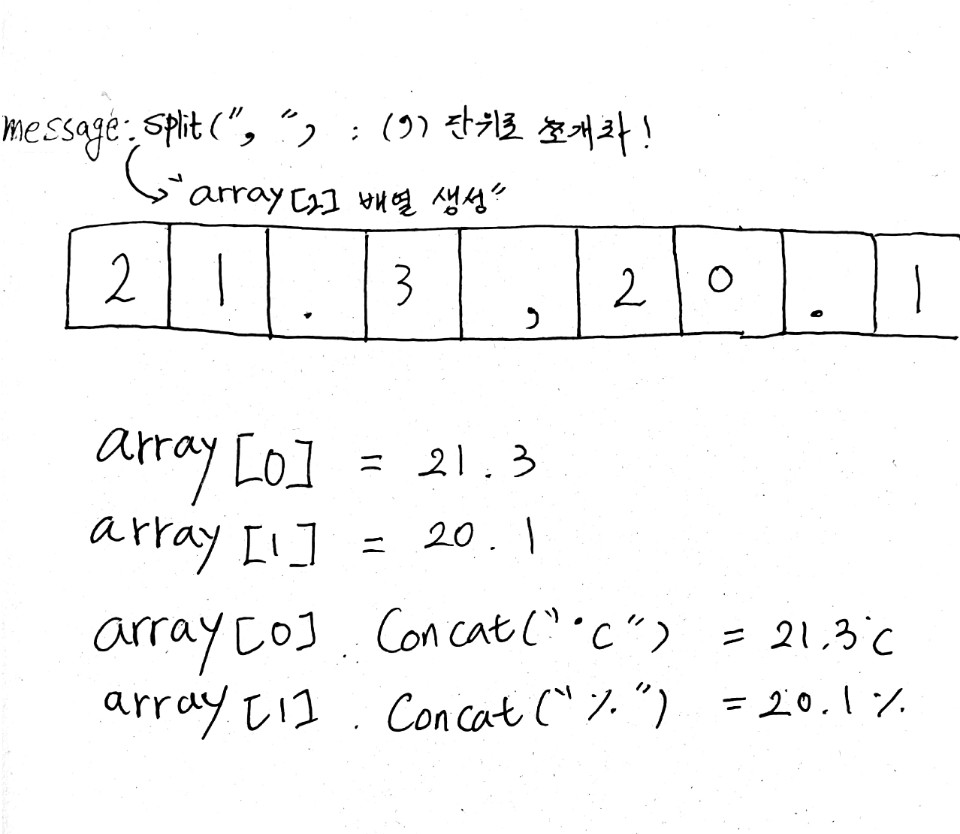
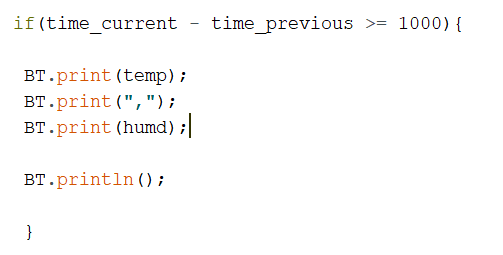
String[] array = message.split(",");
temp.setText(array[0].concat("C"));
humd.setText(array[1].concat("%") );
}
});
// ------------------------------ 데이터 수신부 ----------------------------- //
bt.setBluetoothConnectionListener(new BluetoothSPP.BluetoothConnectionListener() { //연결됐을 때
public void onDeviceConnected(String name, String address) {
Toast.makeText(getApplicationContext()
, "Connected to " + name + "\n" + address
, Toast.LENGTH_SHORT).show();
}
public void onDeviceDisconnected() { //연결해제
Toast.makeText(getApplicationContext()
, "Connection lost", Toast.LENGTH_SHORT).show();
}
public void onDeviceConnectionFailed() { //연결실패
Toast.makeText(getApplicationContext()
, "Unable to connect", Toast.LENGTH_SHORT).show();
}
});
Button btnConnect = findViewById(R.id.btnConnect); //연결시도
btnConnect.setOnClickListener(new View.OnClickListener() {
public void onClick(View v) {
if (bt.getServiceState() == BluetoothState.STATE_CONNECTED) {
bt.disconnect();
} else {
Intent intent = new Intent(getApplicationContext(), DeviceList.class);
startActivityForResult(intent, BluetoothState.REQUEST_CONNECT_DEVICE);
}
}
});
}
public void onDestroy() {
super.onDestroy();
bt.stopService(); //블루투스 중지
}
public void onStart() {
super.onStart();
if (!bt.isBluetoothEnabled()) { //
Intent intent = new Intent(BluetoothAdapter.ACTION_REQUEST_ENABLE);
startActivityForResult(intent, BluetoothState.REQUEST_ENABLE_BT);
} else {
if (!bt.isServiceAvailable()) {
bt.setupService();
bt.startService(BluetoothState.DEVICE_OTHER); //DEVICE_ANDROID는 안드로이드 기기 끼리
setup();
}
}
}
public void setup() {
Button btnSend = findViewById(R.id.btnSend); //데이터 전송
btnSend.setOnClickListener(new View.OnClickListener() {
public void onClick(View v) {
bt.send("Text", true);
}
});
}
public void onActivityResult(int requestCode, int resultCode, Intent data) {
if (requestCode == BluetoothState.REQUEST_CONNECT_DEVICE) {
if (resultCode == Activity.RESULT_OK)
bt.connect(data);
} else if (requestCode == BluetoothState.REQUEST_ENABLE_BT) {
if (resultCode == Activity.RESULT_OK) {
bt.setupService();
bt.startService(BluetoothState.DEVICE_OTHER);
setup();
} else {
Toast.makeText(getApplicationContext()
, "Bluetooth was not enabled."
, Toast.LENGTH_SHORT).show();
finish();
}
}
}
}
728x90
반응형
'임베디드 > Arduino' 카테고리의 다른 글
| [아두이노] MQ 시리즈 공기질 센서 PPM으로 변환하기! (3) Python으로 변환( 번외 편) (0) | 2021.01.23 |
|---|---|
| [아두이노] MQ 시리즈 공기질 센서 PPM으로 변환하기! (2) 회로도 (Schematic) (2) | 2021.01.21 |
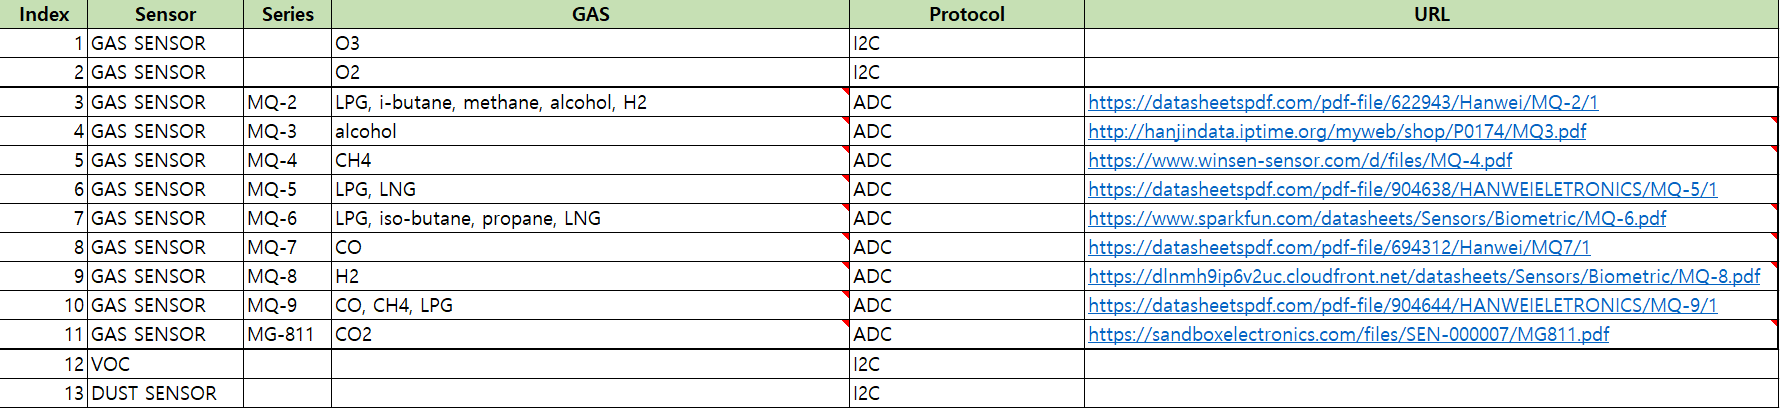
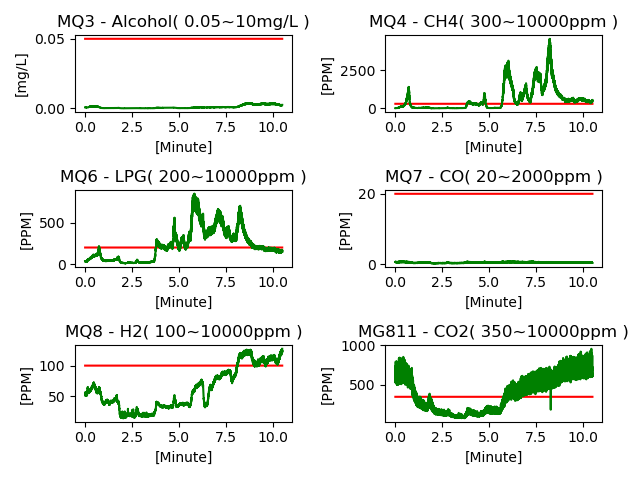
| [아두이노] MQ 시리즈 공기질 센서 PPM으로 변환하기! (1) Feat. MQ2, MQ3, MQ4, MQ5, MQ6, MQ7, MQ8, MQ9, MG-811 (2) | 2020.12.01 |
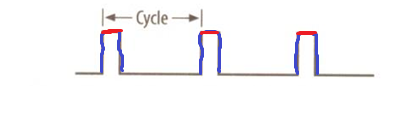
| PWM으로 아날로그 값을 출력해보자! 1편 (0) | 2020.01.28 |
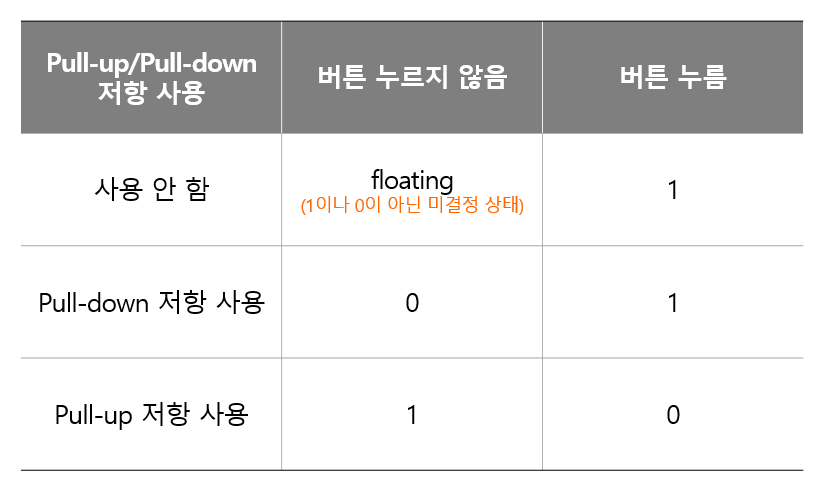
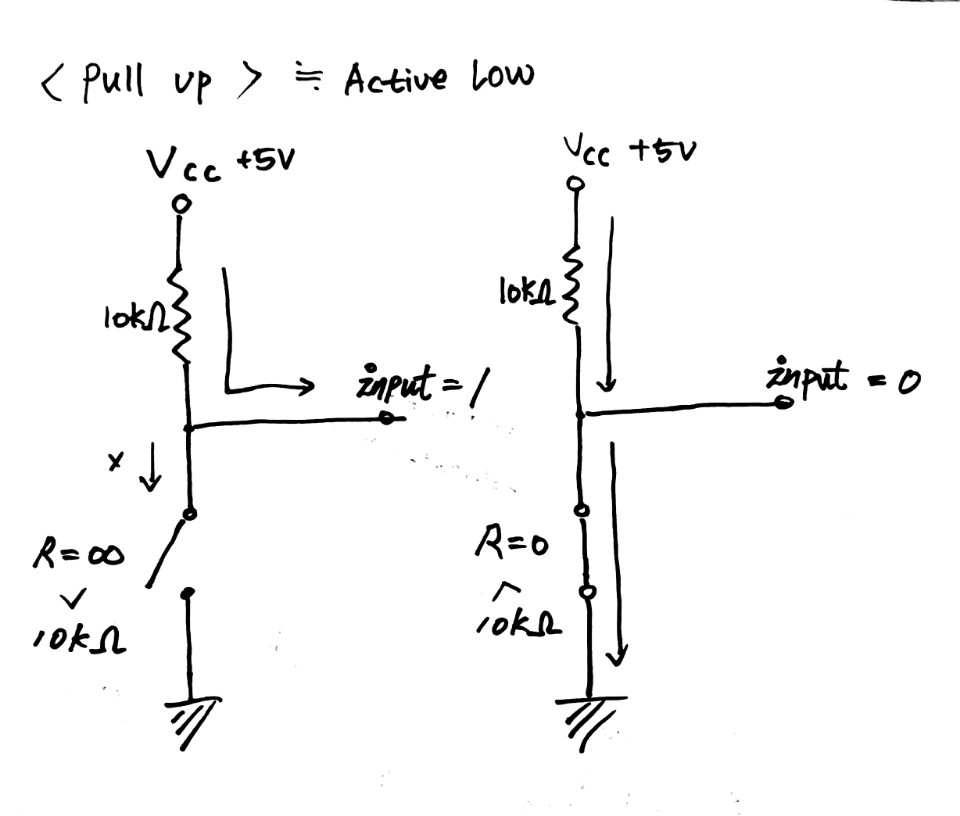
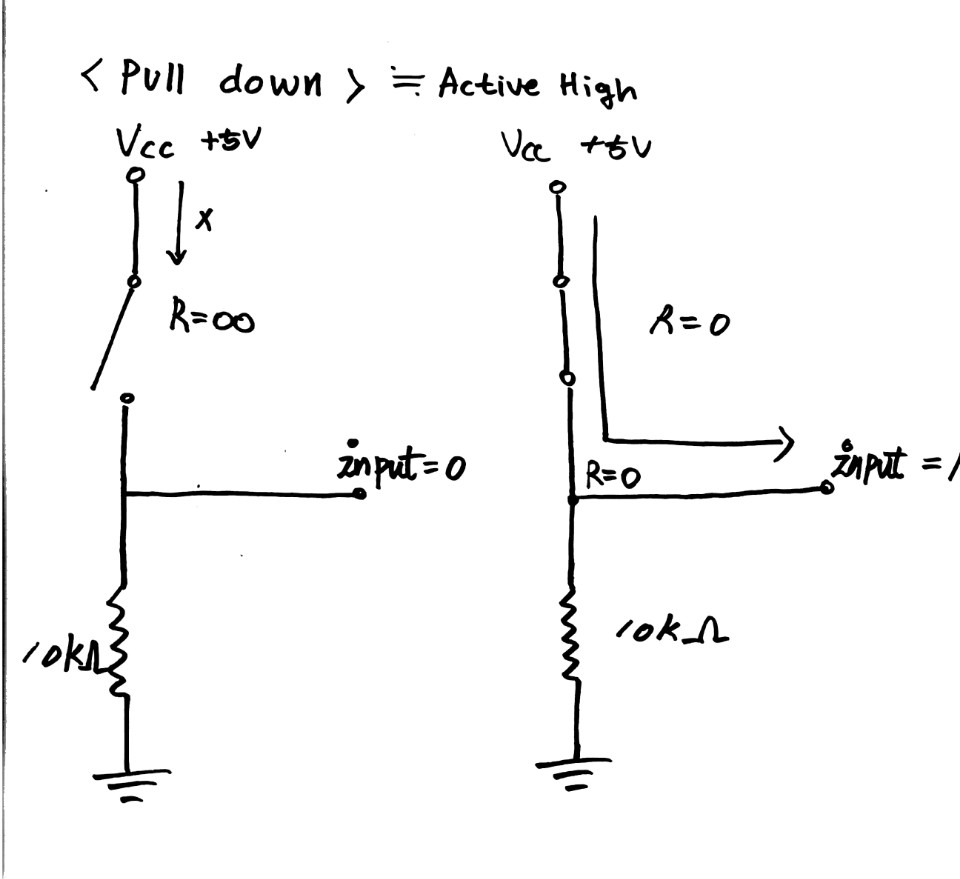
| Pull up(풀업) , Pull down(풀다운) 저항에 대해 알아보자! (0) | 2020.01.26 |